

Skills do not connect external accounts or hold credentials. To let Craft read from or act in tools like Slack, Gmail,
or GitHub, connect an App.
How Craft uses skills
Craft can choose an available skill automatically when your request matches its description. You can also select one explicitly when you want Craft to follow a particular workflow.1
Choose a skill
In a Craft session, select +, then Skills, and choose a skill.
You can also type / followed by the skill name. The selected skill appears as a chip above the input.
2
Describe the result
Tell Craft what to produce and provide the audience, source material, and requirements that matter.
Selecting a skill does not replace a clear prompt.
3
Review and refine
Craft reads the skill instructions before doing covered work. Review the result,
then ask for changes in plain language.
Browse and inspect skills
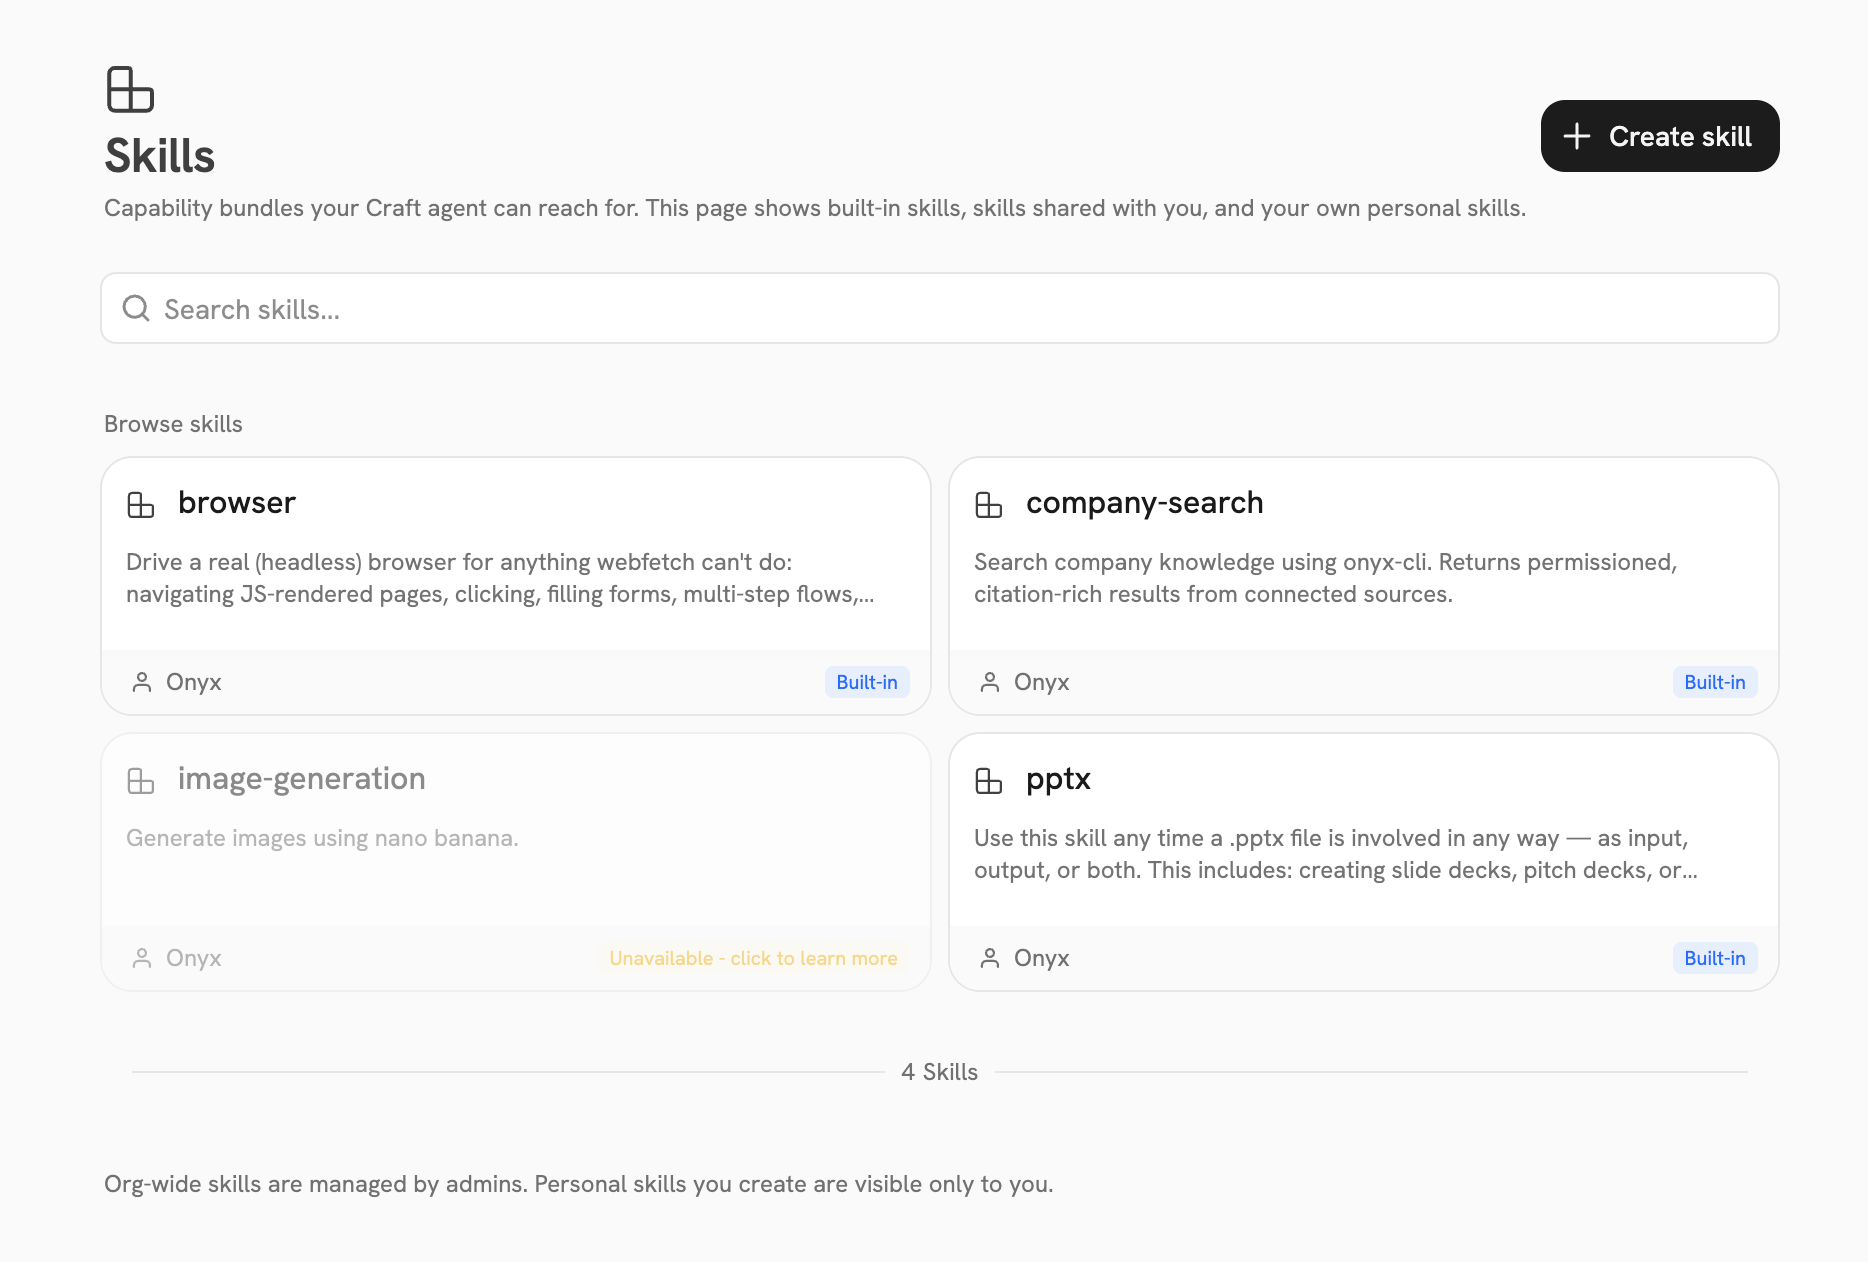
Open Skills from the Craft sidebar to search everything available to you. Select a skill card to preview its instructions before using it.
Built-in skills currently cover presentations, company search, image generation, and website navigation.
The exact list you see depends on what your organization has enabled.
Create a personal skill
Create a personal Skill when you have instructions, examples, or reference files you want to reuse across sessions. Open Skills, select Create skill, then choose how you want to begin:
Every new Skill is personal and private. After creating it, you can share it from the Skill editor.
Start from scratch
1
Add the details
Enter a name and describe when Craft should use the Skill. Onyx uses the name to create the Skill’s identifier,
converting spaces and punctuation to hyphens when needed.
2
Write the instructions
Describe the workflow Craft should follow, including important constraints, expected outputs, and checks.
Switch between the Markdown editor and preview to review the finished instructions.
3
Add supporting files
Add references, examples, templates, scripts, or assets under Supporting files. You can select files or a ZIP,
or drag in a folder. Onyx unpacks ZIP files and preserves the directory structure.
4
Create the Skill
Select Create. Onyx saves the instructions as
SKILL.md and opens the Skill editor, where you can manage files,
sharing, and availability.If you already have a Skill,
use Import skill at the top of the creation page to fill in the form and add its files.
If you have already entered content, Onyx asks before replacing the name, description, instructions,
and supporting files with the imported Skill.
Upload an existing Skill
UploadSKILL.md directly when the Skill contains instructions only. When it includes supporting files,
upload a ZIP or drag in a folder with SKILL.md at the top level.
SKILL.md needs a name and description in YAML frontmatter, followed by the instructions Craft should use:
1
Prepare the bundle
Put the instructions in
SKILL.md and keep supporting files in the same folder. For a folder or ZIP,
use a lowercase, hyphenated name such as weekly-customer-update; that name becomes the Skill’s identifier.
For a standalone SKILL.md, Onyx creates the identifier from its frontmatter name.2
Upload the Skill
Open Skills, select Create skill > Upload a skill, and select
SKILL.md or a ZIP.
You can also drag SKILL.md, a ZIP, or a Skill folder into the upload area. Upload one Skill at a time,
then select Create.3
Review the Skill
Onyx opens the Skill editor after creating it. Review the name, description, instructions,
and file tree before using or sharing the Skill.
Update a Skill
Open a personal Skill to edit its name, description, or instructions. Under Supporting files, you can:- Add individual files, ZIP files, or folders. New files are added to the existing bundle, and matching paths are replaced.
- Browse the bundle as a directory tree and remove files you no longer need.
SKILL.mdcannot be removed. - Upload content that includes
SKILL.mdto replace the current name, description, instructions, and files. Onyx asks you to confirm before replacing the existing Skill content.
Troubleshooting
A skill is missing from the picker
A skill is missing from the picker
Confirm the skill is enabled and shared with you. Unavailable built-in skills do not appear in the session picker.
If the skill depends on a model or deployment feature, ask an admin to configure that dependency.
Craft did not use the skill I expected
Craft did not use the skill I expected
Select the skill from + > Skills or type / and choose it before sending your prompt.
Also name the desired output and important constraints; a skill supplies a method, not the goal itself.
My Skill will not upload
My Skill will not upload
Upload one Skill at a time. Put
SKILL.md at the top level of the folder. In a ZIP,
place it at the archive root or directly inside one enclosing folder.
Confirm that its frontmatter contains non-empty name and description fields. For a folder or ZIP,
check that its name is lowercase and hyphenated. If you started from scratch, try a different Skill name.
A custom Skill cannot use the same identifier as an existing or built-in Skill.For admins
Publish organization skills, configure availability, and review custom bundles.
Connect Apps
Give Craft controlled access to external tools and approve actions safely.